How to set up Shopify Markets for the EU: a step-by-step guide for UK sellers
By Joe Tuckwell
21st July 2026


Selling into the EU from a UK Shopify store has changed dramatically since Brexit. What used to be a simple cross-border sale now involves VAT OSS, IOSS and customs declarations alongside currency differences and language expectations. All-in-all it makes for a more complex process, with plenty of room for error.
Luckily Shopify Markets helps to remove much of the friction by giving you a structured way to build an international storefront. But it isn’t a magic switch.
A rushed or incomplete setup can lead to incorrect VAT being charged, duplicate content, poor translations or customers being redirected back to your UK site. If you’re not familiar with the fundamentals, it’s worth reading our article about what Shopify Markets is and how it works before diving into the practical steps.
This guide is for UK merchants who want a clean, scalable and search-friendly EU market setup without having to create multiple stores. We’ll walk through each stage, from establishing your EU market and choosing the right domain structure to configuring currencies, translations, VAT and hreflang tags.
Ready? Let’s go... actually, hang on for one moment…
Before you start: what you need in place
… Don’t rush headlong into setting up Shopify Markets – pause for a moment to double check everything is in its right place. Just like making sure you’ve got your tickets and passport before leaving for the airport.
There are a few things that need to be in place before you open Shopify and begin configuring Markets. First, you’ll need to be on a paid Shopify plan, as Markets isn’t available on the free trial. Most UK sellers will be on Basic or Growth, both of which support the core features you need for EU expansion. Advanced and Plus plans unlock more automation, but they’re not essential for a clean setup.
Next, you should have a clear sense of which EU countries you want to target first. It’s tempting to tick all 27 boxes, but most UK merchants find it far more manageable to begin with one or two priority regions, often Germany, France, the Netherlands or Ireland. They can then expand once the initial setup is stable. Starting small allows you to refine your processes, test your fulfilment model and understand how EU customers respond to your pricing, content and delivery times.
You’ll also need a basic understanding of your VAT obligations. Post-Brexit selling means you may need to register for VAT OSS or IOSS depending on your fulfilment model and order values. You don’t need to be a tax expert, but you do need clarity on whether you should be charging VAT at checkout. If you’re shipping from the UK into the EU, VAT OSS and IOSS are the two schemes you’ll encounter most often. We’ll cover these in more detail later, but it’s helpful to know which one applies to you before you start configuring Shopify.
Finally, decide on your domain strategy. Whether you choose subdirectories, subdomains or ccTLDs will shape your international SEO for years to come, so it’s worth making this decision early rather than retrofitting it later. Subdirectories are usually the best choice for UK merchants, but we’ll explore all three options in Step 2.
With these pieces in place, you’re ready to build an EU market.

Step 1: Create your EU market in Shopify admin
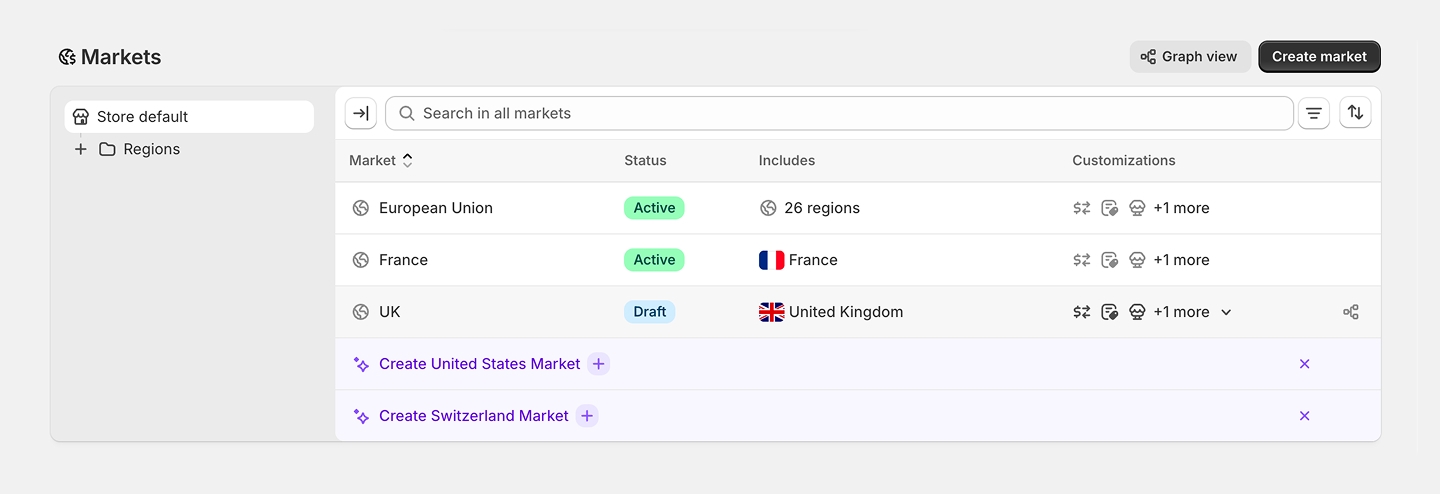
To begin, head to Settings > Markets and select Add market. Give your market a clear name and choose the countries you want to include in it. Shopify will then create a dedicated EU market with its own settings for currency, language, pricing, duties and domain structure.
You can group multiple EU countries into a single market or create individual markets for each country. Grouping is ideal if your pricing, content and language strategy are broadly consistent across the EU. It keeps things simple and reduces the amount of ongoing maintenance. For example, if you plan to sell in English across the EU with a single EUR price list, a single EU market is usually the cleanest approach.
Creating individual markets gives you more detailed control over pricing, language and content, and is often the better choice if you’re planning deeper market localisation or want to optimise for country-specific SEO. For example, Germany and France often require different product descriptions, different keyword targeting and sometimes different pricing. If you’re investing in local content or translation, separate markets make sense.
Many UK merchants start with a single EU market and split it later as they grow. Shopify makes this transition relatively painless, so you can evolve your business as it expands.
Step 2: Configure your domain structure
Your domain structure is one of the most important decisions you’ll make, because it affects your SEO, your hreflang tags, your analytics and how customers perceive your brand. Shopify supports three approaches: subdirectories, subdomains and ccTLDs.
For most UK merchants, subdirectories are the best long-term choice. A structure like yourstore.com/de/ or yourstore.com/fr/ keeps everything under one domain, consolidating your authority and making your international SEO far easier to manage. It also integrates cleanly with Shopify Markets, which handles subdirectory routing natively. Subdirectories are also the easiest to maintain, as they don’t require separate domain registrations or DNS management.
Subdomains, such as de.yourstore.com, can work, but they split your domain authority and require more SEO effort to maintain. They can also introduce complexity when it comes to canonical tags and duplicate content. If you choose subdomains, you’ll need to be more diligent about hreflang validation and internal linking.
ccTLDs, like yourstore.de, look the most like a local website and can feel the most authentic to customers, but they’re expensive to maintain and fragment your SEO across multiple domains. They also require separate domain registrations, which can be costly and time-consuming. Unless you have a compelling reason such as a strong brand presence in a specific EU country, subdirectories offer the best balance of simplicity, scalability and search performance.
Step 3: Set your currency and pricing
Once your domain structure is in place, you can configure your currency settings. EU customers expect to shop in EUR, and Shopify makes this straightforward. In your EU market settings, enable EUR and decide whether you want to use automatic conversion or manual price overrides.
Automatic conversion uses real-time exchange rates to convert your GBP prices into EUR. It’s effortless and always up to date, but it can lead to fluctuating prices and awkward price points – the kind that end in .43 or .87 and look a little odd. It can also affect your margins if exchange rates move sharply. For brands with tight margins or premium positioning, this lack of control can be problematic.
Manual price overrides give you full control. You can set clean, stable EUR prices that align with your brand positioning and conversion strategy. It requires more setup, but it creates a far more polished experience for EU customers. If you’re aiming for a premium feel or want predictable margins, manual overrides are usually the better choice.
You can explore this further in our guide to currency configuration and pricing. And if you’re planning to expand into more currencies, our article on selling in multiple currencies is worth a read.
Step 4: Set up language and translation
Language is one of the biggest drivers of trust in EU markets. Even if lots of your customers speak English, they expect to shop in their own language. Google expects to index content in the correct language too.
Shopify’s Translate and Adapt app is included for free and provides a solid starting point. It automatically translates your product descriptions, theme content and navigation, and allows you to add custom translations where needed.
However, automated translation is only ever a draft. It often struggles with nuance, tone of voice, technical descriptions and brand language. Publishing content without review is one of the quickest ways to damage your EU conversion rate. It can also create thin or low-quality content, which harms your Shopify international SEO
If you’re expanding into multiple EU markets or need a more sophisticated workflow, Weglot is a good option. It offers higher-quality machine translation, professional translation services and better tools for managing multilingual content at scale. It’s a paid solution, but for brands investing seriously in market localisation, it can be worth the cost.

Step 5: Handle EU VAT and duties
VAT is the part of EU expansion that probably causes most anxiety for shop owners. VAT OSS simplifies VAT for sellers shipping goods to EU consumers, allowing you to file a single quarterly return once you exceed the €10,000 threshold. IOSS applies to orders under €150 shipped from the UK directly to EU customers, allowing VAT to be collected at checkout and preventing unexpected charges on delivery.
Shopify can collect VAT at checkout, display VAT-inclusive prices and calculate VAT based on the customer’s location. It cannot register you for VAT or file returns. If you want Shopify to handle more of the heavy lifting, Managed Markets automates duties, taxes, customs documentation and IOSS numbers, making EU expansion far more manageable for growing brands.
This section is informational only. You should always seek professional tax advice before registering for VAT OSS or IOSS.
Step 6: Validate your hreflang and international SEO setup
Once your EU market is configured, it’s essential to make sure Google understands your international structure. Shopify generates hreflang tags automatically, but they’re not always perfect.
Start by checking Google Search Console’s International Targeting report. Then run a crawl using a tool like Screaming Frog to check for missing x-default tags, incorrect language codes, self-referencing canonical conflicts and duplicate content across markets.
For a deeper dive into this, see our main guide to Shopify international SEO.
Common mistakes UK sellers make when setting up EU markets
Although Shopify Markets has made it much easier to sell into the EU, it’s still a complicated undertaking and easy to overlook important steps.
Many merchants launch too many markets at once, rely solely on machine translation, skip VAT OSS registration, don’t carry out market-specific keyword research or forget to validate hreflang tags. Others mix domain structures or enable geolocation redirects without testing, accidentally blocking Googlebot from crawling their EU storefront.
A clean, well-structured setup avoids these pitfalls and builds a strong foundation for your push into EU markets.
A quick recap
Hopefully you’ve got a better idea of how to set up Shopify Markets for the EU. Before you go here’s a reminder of some of the key questions we often get asked:
Do UK sellers need to register for EU VAT to use Shopify Markets?
Yes. If you’re selling goods to EU consumers above the relevant thresholds, you will likely need to register for VAT via the EU’s OSS scheme. Shopify Markets can collect and display VAT at checkout, but it doesn’t handle registration or filing.
Can I use Shopify Markets to sell into multiple EU countries at once?
Yes. You can group multiple EU countries into a single market or create individual markets per country for more granular control over pricing and content.
Does Shopify automatically translate my store for EU markets?
Shopify’s Translate and Adapt app provides automatic machine translation as a starting point, but we recommend reviewing content before publishing.
Which domain structure is best for Shopify EU markets?
For most UK merchants, subdirectories (such as yourstore.com/de/) are recommended as they consolidate domain authority into a single root domain. Shopify Markets supports subdirectory configuration natively.
Need a hand entering EU markets?
Crossing the English Channel with your Shopify store is exciting, but getting the technical side of things right is vital if it’s going to crack markets on the continental. If you’d like a partner who can simplify the process and set you up for long-term success, MoreSoda is here to help.